


前回までで一般的なキー操作はできるようになりましたが、今回はdelay()関数を使って、順次キー入力を送信して、アプリケーションを立ち上げるボタンを作成します。
今回は、WindowsやMacに最初からインストールされているアプリでテストします。
Windowsアプリケーション起動バージョン(名称のあるアプリ)
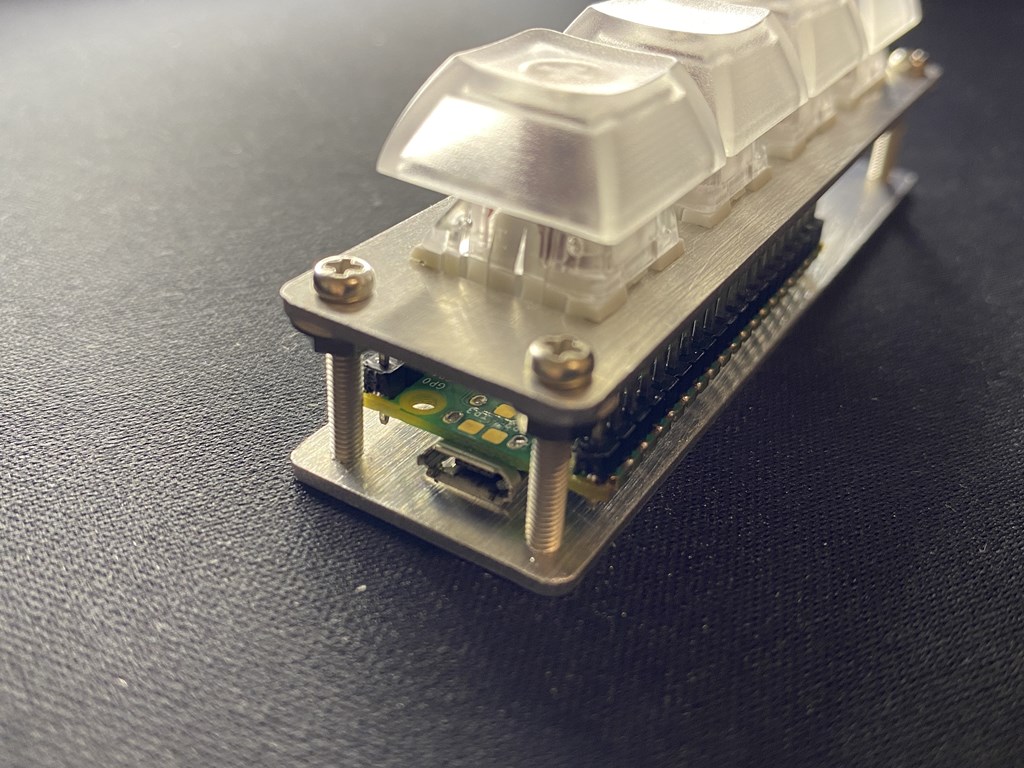
必要なもの
- Arduino Pro Micro・Raspberry Pi PiconなどArduinoIDEに対応しておりHID準拠の物
- ブレッドボード(あると便利です)
- ボタン(スイッチ)4個 CherryMX互換のメカニカルキースイッチなど
- 接続用のジャンパーワイヤ
配線図
- ボタン1: デジタルピン 2
- ボタン2: デジタルピン 3
- ボタン3: デジタルピン 4
- ボタン4: デジタルピン 5
- 各ボタンの片方の端子はGNDに接続し、もう片方の端子は対応するデジタルピンに接続します。
Windowsアプリケーション起動用スケッチ
以下のスケッチをArduino IDEにコピーして、Pro MicroやRaspberry Pi Picoなどにアップロードしてください。
#include <Keyboard.h>

// ボタンのピン番号
const int button1Pin = 2;
const int button2Pin = 3;
const int button3Pin = 4;
const int button4Pin = 5;

// ボタンの状態
int button1State = 0;
int button2State = 0;
int button3State = 0;
int button4State = 0;

void setup() {
  // ボタンピンを入力に設定
  pinMode(button1Pin, INPUT_PULLUP);
  pinMode(button2Pin, INPUT_PULLUP);
  pinMode(button3Pin, INPUT_PULLUP);
  pinMode(button4Pin, INPUT_PULLUP);

  // キーボードの初期化
  Keyboard.begin();
}

void loop() {
  // ボタンの状態を読み取る
  button1State = digitalRead(button1Pin);
  button2State = digitalRead(button2Pin);
  button3State = digitalRead(button3Pin);
  button4State = digitalRead(button4Pin);

  // ボタン1が押されたらメモ帳を起動
  if (button1State == LOW) {
    Keyboard.press(KEY_LEFT_GUI);  // Windowsキーを押す
    Keyboard.press('r');           // Rキーを押す
    delay(100);
    Keyboard.releaseAll();         // WindowsキーとRキーを離す

    delay(500);

    Keyboard.print("notepad");
    delay(100);
    Keyboard.write(KEY_RETURN);    // Enterキーを押す
  }

  // ボタン2が押されたらコマンドプロンプトを起動
  if (button2State == LOW) {
    Keyboard.press(KEY_LEFT_GUI);  // Windowsキーを押す
    Keyboard.press('r');           // Rキーを押す
    delay(100);
    Keyboard.releaseAll();         // WindowsキーとRキーを離す

    delay(500);

    Keyboard.print("cmd");
    delay(100);
    Keyboard.write(KEY_RETURN);    // Enterキーを押す
  }

  // ボタン3が押されたらエクスプローラーを起動
  if (button3State == LOW) {
    Keyboard.press(KEY_LEFT_GUI);  // Windowsキーを押す
    Keyboard.press('r');           // Rキーを押す
    delay(100);
    Keyboard.releaseAll();         // WindowsキーとRキーを離す

    delay(500);

    Keyboard.print("explorer");
    delay(100);
    Keyboard.write(KEY_RETURN);    // Enterキーを押す
  }

  // ボタン4が押されたら電卓を起動
  if (button4State == LOW) {
    Keyboard.press(KEY_LEFT_GUI);  // Windowsキーを押す
    Keyboard.press('r');           // Rキーを押す
    delay(100);
    Keyboard.releaseAll();         // WindowsキーとRキーを離す

    delay(500);

    Keyboard.print("calc");
    delay(100);
    Keyboard.write(KEY_RETURN);    // Enterキーを押す
  }

  delay(200); // ボタン押下のデバウンス用
}
スケッチの説明
1.ボタンの設定:
- ボタンを接続するピンを定義し、
pinMode関数を使って各ピンを入力モードに設定します。内部プルアップ抵抗を使うため、INPUT_PULLUPモードを使用しています。
2.ボタンの状態の読み取り:
digitalRead関数を使って各ボタンの状態を読み取り、ボタンが押されている場合(LOW)に対応する処理を行います。
3.アプリケーションの起動:
- 各ボタンが押されたとき、WindowsキーとRキーの組み合わせ(Win+R)を送信し、
runダイアログを開きます。 - アプリケーション名(
notepad,cmd,explorer,calc)を入力し、Enterキーを押してアプリケーションを起動します。
実際には一発起動ではなく、キー操作を順次行って、キーボード操作でアプリを立ち上げています。
Macアプリケーション起動バージョン(名称のあるアプリ)
Macでも同様の操作は可能なので、Mac用のスケッチも載せておきますが、基本的にはキー操作が少し変わるだけで動作に関してはほぼ内容は同じです。
Macアプリ起動用スケッチ
#include <Keyboard.h>

// ボタンのピン番号
const int button1Pin = 2;
const int button2Pin = 3;
const int button3Pin = 4;
const int button4Pin = 5;

// ボタンの状態
int button1State = 0;
int button2State = 0;
int button3State = 0;
int button4State = 0;

void setup() {
  // ボタンピンを入力に設定
  pinMode(button1Pin, INPUT_PULLUP);
  pinMode(button2Pin, INPUT_PULLUP);
  pinMode(button3Pin, INPUT_PULLUP);
  pinMode(button4Pin, INPUT_PULLUP);

  // キーボードの初期化
  Keyboard.begin();
}

void loop() {
  // ボタンの状態を読み取る
  button1State = digitalRead(button1Pin);
  button2State = digitalRead(button2Pin);
  button3State = digitalRead(button3Pin);
  button4State = digitalRead(button4Pin);

  // ボタン1が押されたら メモを起動
  if (button1State == LOW) {
    Keyboard.press(KEY_LEFT_GUI);
    Keyboard.press(' ');
    delay(200);
    Keyboard.releaseAll();
    delay(500);
    Keyboard.print("Notes");
    delay(200);
    Keyboard.press(KEY_RETURN);
    Keyboard.releaseAll();
    delay(500); // デバウンス対策
  }

  // ボタン2が押されたら Safariを起動
  if (button2State == LOW) {
    Keyboard.press(KEY_LEFT_GUI);
    Keyboard.press(' ');
    delay(200);
    Keyboard.releaseAll();
    delay(500);
    Keyboard.print("Safari");
    delay(200);
    Keyboard.press(KEY_RETURN);
    Keyboard.releaseAll();
    delay(500); // デバウンス対策
  }

  // ボタン3が押されたら ファインダーを起動
  if (button3State == LOW) {
    Keyboard.press(KEY_LEFT_GUI);
    Keyboard.press(' ');
    delay(200);
    Keyboard.releaseAll();
    delay(500);
    Keyboard.print("Finder");
    delay(200);
    Keyboard.press(KEY_RETURN);
    Keyboard.releaseAll();
    delay(500); // デバウンス対策
  }

  // ボタン4が押されたら 電卓を起動
  if (button4State == LOW) {
    Keyboard.press(KEY_LEFT_GUI);
    Keyboard.press(' ');
    delay(200);
    Keyboard.releaseAll();
    delay(500);
    Keyboard.print("Calculator");
    delay(200);
    Keyboard.press(KEY_RETURN);
    Keyboard.releaseAll();
    delay(500); // デバウンス対策
  }
}
スケッチの説明
1.ボタン1の処理(メモを起動)
   if (button1State == LOW) {
     Keyboard.press(KEY_LEFT_GUI);
     Keyboard.press(' ');
     delay(200);
     Keyboard.releaseAll();
     delay(500);
     Keyboard.print("Notes");
     delay(200);
     Keyboard.press(KEY_RETURN);
     Keyboard.releaseAll();
     delay(500);
   }
- ボタン1が押されたら(LOW)、Cmd+Spaceを押してSpotlightを開き、「Notes」と入力してEnterキーを押し、メモを起動します。
2.ボタン2の処理(Safariを起動)
   if (button2State == LOW) {
     Keyboard.press(KEY_LEFT_GUI);
     Keyboard.press(' ');
     delay(200);
     Keyboard.releaseAll();
     delay(500);
     Keyboard.print("Safari");
     delay(200);
     Keyboard.press(KEY_RETURN);
     Keyboard.releaseAll();
     delay(500);
   }
- ボタン2が押されたら(LOW)、Cmd+Spaceを押してSpotlightを開き、「Safari」と入力してEnterキーを押し、Safariを起動します。
3.ボタン3の処理(ファインダーを起動)
   if (button3State == LOW) {
     Keyboard.press(KEY_LEFT_GUI);
     Keyboard.press(' ');
     delay(200);
     Keyboard.releaseAll();
     delay(500);
     Keyboard.print("Finder");
     delay(200);
     Keyboard.press(KEY_RETURN);
     Keyboard.releaseAll();
     delay(500);
   }
- ボタン3が押されたら(LOW)、Cmd+Spaceを押してSpotlightを開き、「Finder」と入力してEnterキーを押し、ファインダーを起動します。
4.ボタン4の処理(電卓を起動)
   if (button4State == LOW) {
     Keyboard.press(KEY_LEFT_GUI);
     Keyboard.press(' ');
     delay(200);
     Keyboard.releaseAll();
     delay(500);
     Keyboard.print("Calculator");
     delay(200);
     Keyboard.press(KEY_RETURN);
     Keyboard.releaseAll();
     delay(500);
   }
- ボタン4が押されたら(LOW)、Cmd+Spaceを押してSpotlightを開き、「Calculator」と入力してEnterキーを押し、電卓を起動します。
パスを指定でのファイル起動および.exe起動方法
今回は通常のファイルや.exeファイルの立ち上げ方です。
流れとしては先ほどと同じですが、「ファイル名を指定して実行」ダイアログ内にファイルのパスを入力してエンターキーを押してファイル立ち上げます。
パスでのファイル・exe起動スケッチ
  // Winキー + R を押す
  Keyboard.press(KEY_LEFT_GUI);
  Keyboard.press('r');
  delay(100);
  Keyboard.releaseAll();

  // ファイルのパスを入力サンプルはCドライブ直下のsample.txt
  Keyboard.print("C:\sample.txt");
  delay(100);

  // エンターキーを押す
  Keyboard.press(KEY_RETURN);
  delay(100);
  Keyboard.releaseAll();
スケッチの説明
Keyboard.press(KEY_LEFT_GUI);とKeyboard.press('r');で、WindowsキーとRキーを同時に押して、「ファイル名を指定して実行」ダイアログを開きます。Keyboard.releaseAll();で、すべてのキーをリリースします。Keyboard.print("C:\sample.txt");で、ファイルのパスを入力します。Keyboard.press(KEY_RETURN);で、エンターキーを押します。Keyboard.releaseAll();で、すべてのキーをリリースします。
キーボードで、同様の操作を行って動作するのであれば.exeファイルも起動することが出来ます。
パスでのファイル起動(Mac)
ほぼWindowsと同じですがMacでファイルパスを指定する場合のサンプルスケッチです。
#include <Keyboard.h>

const int buttonPin = 2;  // ボタンが接続されているピン番号
int buttonState = 0;      // ボタンの状態を保存する変数

void setup() {
  // ボタンピンを入力モードに設定
  pinMode(buttonPin, INPUT_PULLUP);

  // キーボードライブラリの初期化
  Keyboard.begin();
}

void loop() {
  // ボタンの状態を読み取る
  buttonState = digitalRead(buttonPin);

  // ボタンが押されたときの処理
  if (buttonState == LOW) {
    // Command (⌘) + スペースを押してスポットライトを開く
    Keyboard.press(KEY_LEFT_GUI);  // Command (⌘) キーを押す
    delay(50);
    Keyboard.press(' ');  // スペースキーを押す
    delay(50);
    Keyboard.release(' ');  // スペースキーを離す
    Keyboard.release(KEY_LEFT_GUI);  // Command (⌘) キーを離す
    delay(500);  // スポットライトが開くのを待つ

    // ファイルパスを入力する(ここでは例として「/Applications/Calculator.app」)
    Keyboard.print("/Applications/Calculator.app");
    delay(100);

    // Enterキーを押す
    Keyboard.press(KEY_RETURN);
    delay(50);
    Keyboard.release(KEY_RETURN);

    // ボタンが押されるのを待つ
    while (digitalRead(buttonPin) == LOW) {
      delay(10);
    }
  }
}
説明
スポットライトを開いてパスを入れる形です
ファイルを開きたい場合は
// ファイルパスを入力する(ここでは例として「/Users/username/Documents/example.txt」)
    Keyboard.print("/Users/username/Documents/example.txt");
    delay(100);
ユーザー名などの部分に気を付けてパスを入れてください。
まとめ
一連のキー操作を送信することで、キーボードの操作を自動実行してアプリやファイルをキーを押すだけで立ち上げることが出来るようになりました。
定型の作業などは、ファイルを開いた後の操作も追加可能です。
今回はMacに関しても記載していますが、WindowsのArduinoIDEでスケッチを作成してアップロードしたArduinoやPicoをMacで利用することは可能です(もちろんその逆も)。
機種独自の装飾キーなどは注意が必要ですがArduino自体はクロスプラットホームで動作します。
ここまでのスケッチなどを組み合わせてカスタマイズすれば、自作でのマクロキーボードならではの特殊な操作が可能になってきます。
コメント